this is very easy . here i will provide you this tutorial for creating free email for your domain. Google Apps is a service from Google that allows you to create your own email for free! Yep, Google anti-spam, the Gmail web interface, mobile push service, and 7GB email storage for up to ten personal accounts (you@yourdomain.com). Switching over from my hosting company’s shitty email server was a no-brainer and took just about 30 minutes.
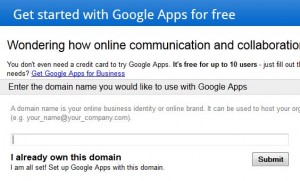
[requirements]To use Google Apps Free, you must own your domain and have access to your domain hosting control panel (CPANEL), FTP, and/or in some cases your domain registry account. My own domain (geneomatic.com) is registered with Godaddy and my hosting company (bluehost.com) offers both FTP and CPANEL access.[step 1] Sign up for Google Apps Free. For this step you’ll need your domain name (i.e. yourdomain.com), an address, alternate email and phone number.
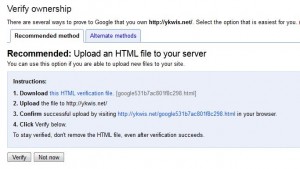
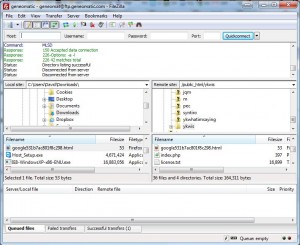
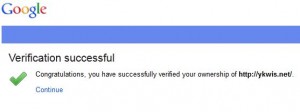
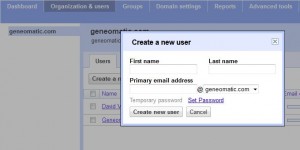
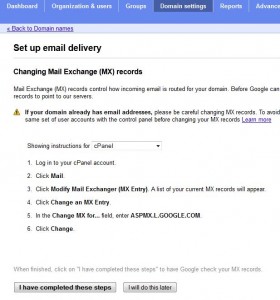
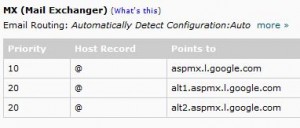
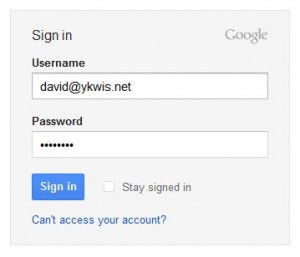
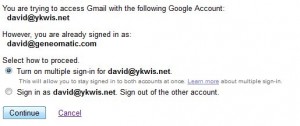
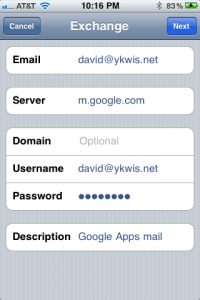
[step 2] Verify domain ownership. In this step you’ll have to prove to Google that you are the rightful owner of your domain. It’ll require you to upload a small HTML file to your website. Alternatively you can create a custom DNS record or add a META tag to your website’s index page. NOTE: If you have FTP access to your domain website, the HTML file method will be the easiest way to verify ownership.[step 3] Use the the Google Apps Dashboard to create some email accounts/users. Click Organization & users->Create a new user.[step 4] Setup MX records. Now that my domain has been verified, we’re ready to point MX (Mail Exchanger) records to Google. In the GA Dashboard by click Domain Settings->Domain Names->Setup MX Records to get started.For your convenience, Google has provided custom instructions on how to accomplish this step for most popular Hosting Companies. Simply select yours from the list and follow the instructions.Log into your hosting companies CPANEL account and change/create the MX records.When done, click I have completed these steps and you’ll see the message below for a few minutes:[step 5] Wait a few minutes and re-check validation. Your GA Dashboard should now show Active where it previously said MX records setup validation in progress…[step 6] Log in to Gmail and send some test emails. Navigate tohttp://mail.google.com and sign in using the personal email & temporary password you created in [step 3].NOTE: You’ll need change your password and accept some terms upon first login. Also, if you’re planning on signing into multiple Gmail accounts (i.e. dave@gmail.com and dave@geneomatic.com) in the same browser, you’ll want to select the multiplemultiple sign-on option when first logging into your GA Gmail account.[step 7] Setup email on your phone. In this step we’ll configure an iPhone to receive our new GA email using push notifications. On the iPhone, tap Settings->Mail, Contacts, Calendar->Add Account…->Microsoft ExchangeNow enter your email, your email as your username, your password, a description and click Next. Then enter m.google.com in the Server field and click Next.Select the items you want to be synched to your phone and click Save.Navigate to your mail App and select your new account. You should see two email messages from Google.That's it you are done with it . enjoy .

![IMG_0490[1]](http://davidvielmetter.com/wp-content/uploads/2007/05/IMG_04901-200x300.png)
![IMG_0491[1]](http://davidvielmetter.com/wp-content/uploads/2007/05/IMG_04911-200x300.png)
![IMG_0486[1]](http://davidvielmetter.com/wp-content/uploads/2007/05/IMG_04861-200x300.png)
![IMG_0488[1]](http://davidvielmetter.com/wp-content/uploads/2007/05/IMG_04881-200x300.png)
![IMG_0489[1]](http://davidvielmetter.com/wp-content/uploads/2007/05/IMG_04891-200x300.png)


